iSpring Learn allows you to use SAML 2.0 to enable single sign-on to the account.

Authorization with SAML 2.0 also works in the mobile application.

To set up SAML 2.0 authentication in your account:

  1. Go to Services Connected Apps.

  2. Then, in the Single Sign-On section, click Turn On.


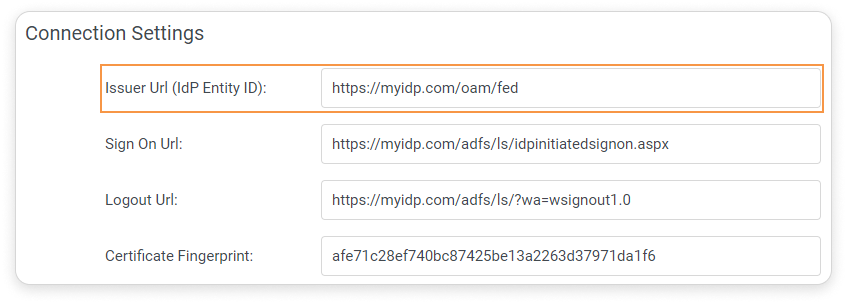
  3. Fill out the form fields, adding the URL, and other details of your identity provider. The latter is the resource your users are supposed to use for the initial authorization on your corporate portal.


    Issuer Url (IdP Entity ID)

    The URL that uniquely identifies the identity provider service. This value is equal to the Issuer element in the SAML 2.0 request sent by the identity provider.

    Sign On Url

    Path to the server script which generates SAML 2.0 identifier confirmation requests to handle authorization.

    Logout Url

    Path to the server script which generates SAML 2.0 identifier confirmation requests to handle logout.

    Certificate Fingerprint

    A short version of the public key certificate for verifying a digital signature. It is used to confirm signing requests issued by an identity provider. Learn more about certificate fingerprints here.

    Redirect users to the SSO login page

    If this option is enabled, the iSpring login page will have the following URL: https://yourcompany.ispringlearn.com/sso/login.


  4. If needed, match fields in iSpring Learn and your SSO service.


  5. Next, click Enable.


  6. Then, add link to the corporate site in the Quick Links section.


If you get a 400 error and a message about the request being composed incorrectly ("Cannot retrieve metadata for IdP 'https://myidp.com/oam/fed' because it isn't a valid IdP for this SP") after you enabled SAML 2.0 in your iSpring Learn account, it means that the value set for the Issuer Url (IdP Entity ID) field is incorrect.
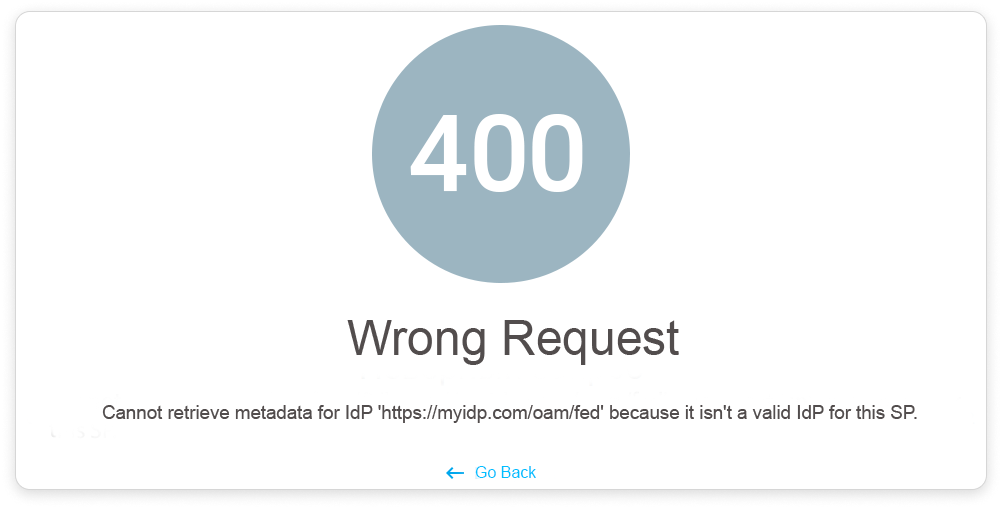
To make the SAML 2.0 authorization work properly in your account, copy the URL from the error text and paste it into the Issuer Url (IdP Entity ID) field.